

Buddy Hex Former for Prusa Buddy Camera
A Redesigned Case for Prusa XL and MK4
The Prusa Buddy camera is a powerful tool for remote print monitoring through Prusa Connect, but its original housing is fairly utilitarian. With the Buddy Hex Former, I redesigned the camera case to improve both aesthetics and usability, while remaining fully compatible with the original Prusa hardware.
This new housing is designed for Prusa XL and MK4 users who want a cleaner, more integrated look, inspired directly by Prusa’s visual identity.

A Hexagon-Inspired Design, True to Prusa Aesthetics
The first goal of this redesign was visual. The original Prusa case works well, but I wanted something that feels more premium and more aligned with Prusa’s industrial design.
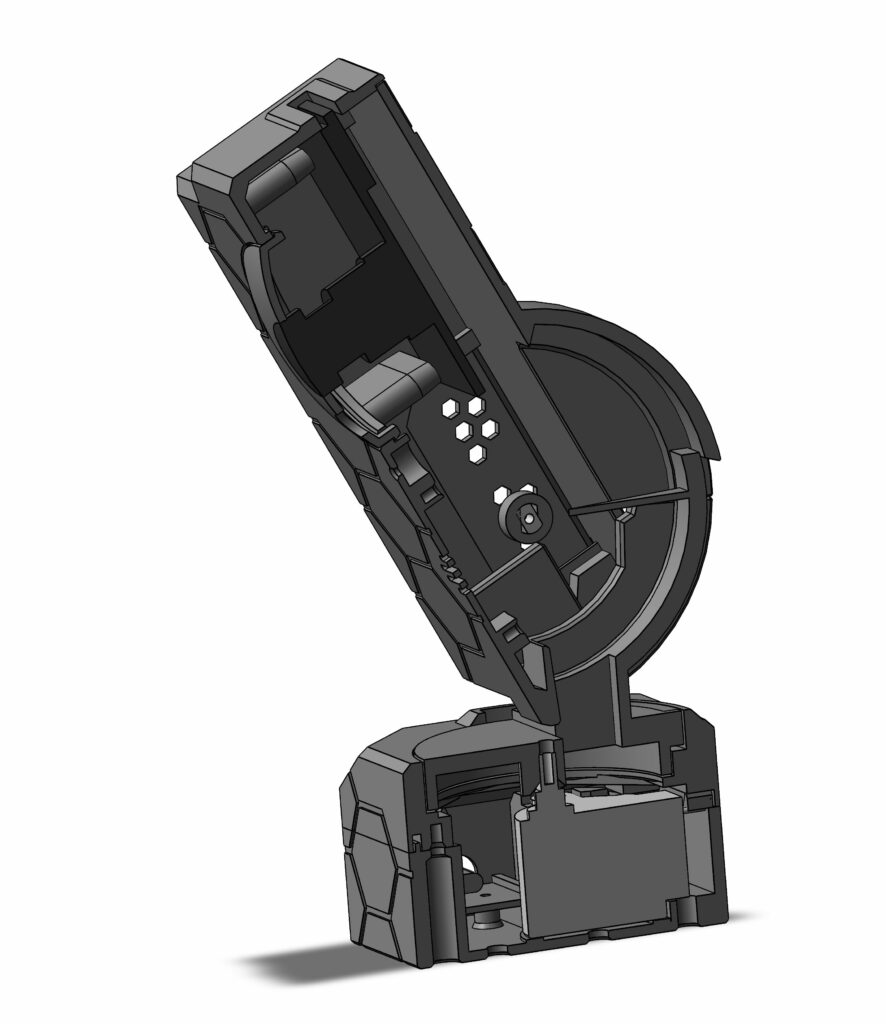
The result is a hexagon-style enclosure that:
- Looks more modern and technical
- Matches the Prusa ecosystem visually
- Feels like an original Prusa accessory rather than an add-on
This makes the camera blend naturally into the printer instead of standing out as a separate component.
Improved Viewing Angle with Negative Tilt
Beyond aesthetics, usability was a key focus of the design.
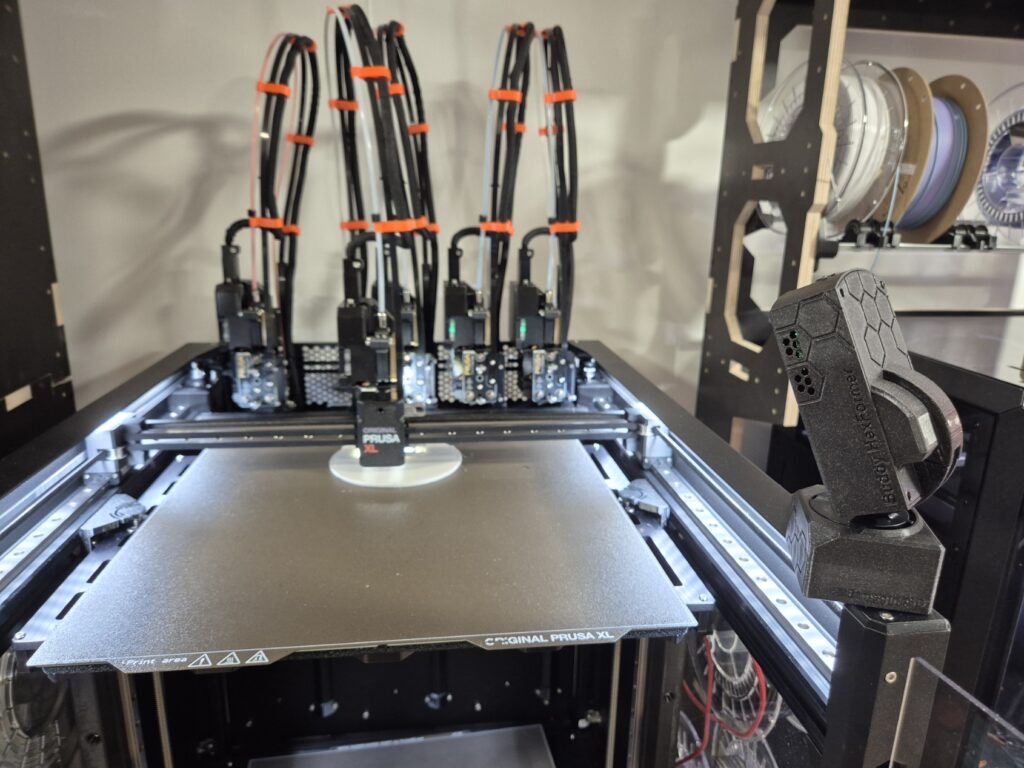
The Buddy Hex Former allows a negative tilt, which makes it much easier to correctly frame the build plate and monitor prints.
This improved angle is especially useful for:
- Large prints on the Prusa XL
- Better framing for snapshots and timelapses
No Modifications – All Original Components Reused
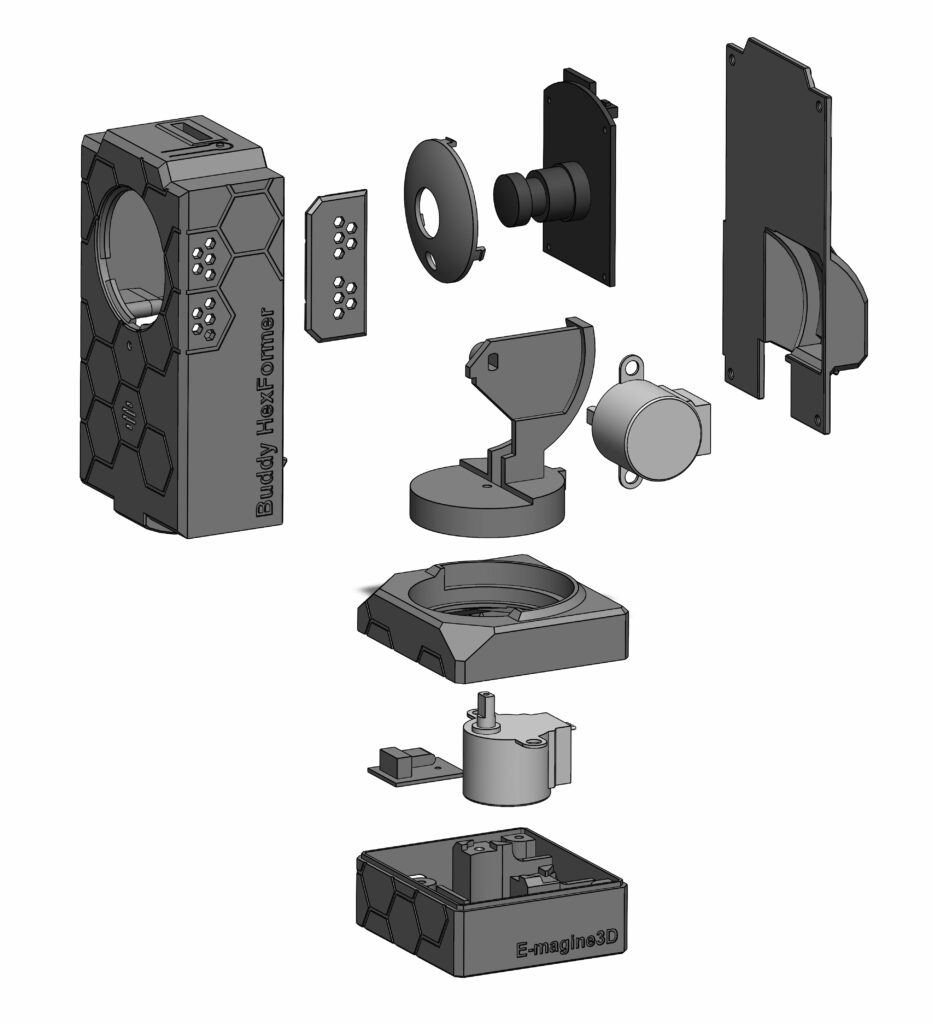
One of the most important aspects of this project is that no hardware modifications are required.
All original components from the Prusa Buddy camera are reused:
- Speaker
- Microphone
- PCB
- Motors
- Screws
You simply disassemble the original case and reinstall everything into the new housing. Nothing needs to be cut, modified, or replaced.
Easy to Print, Easy to Mount
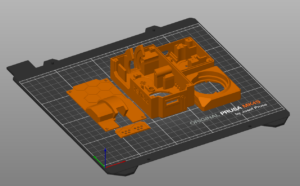
The model has been designed for straightforward FDM printing:
- Easy to print in PLA
- No supports required
- Beginner-friendly geometry
A ready-to-print 3MF file containing all parts is provided, making slicing and printing quick and reliable.
The base is also very versatile:
- Can be mounted using screws
- Or with 3×8 mm magnets for a removable setup
This gives you full flexibility depending on your printer setup and preferences.
Print Settings & Materials
The model works perfectly in PLA, which is more than sufficient for this application.
Other common materials can also be used if desired.
Key points:
- No supports required
- Clean overhangs and reliable tolerances
- Designed for consistent results on standard FDM printers
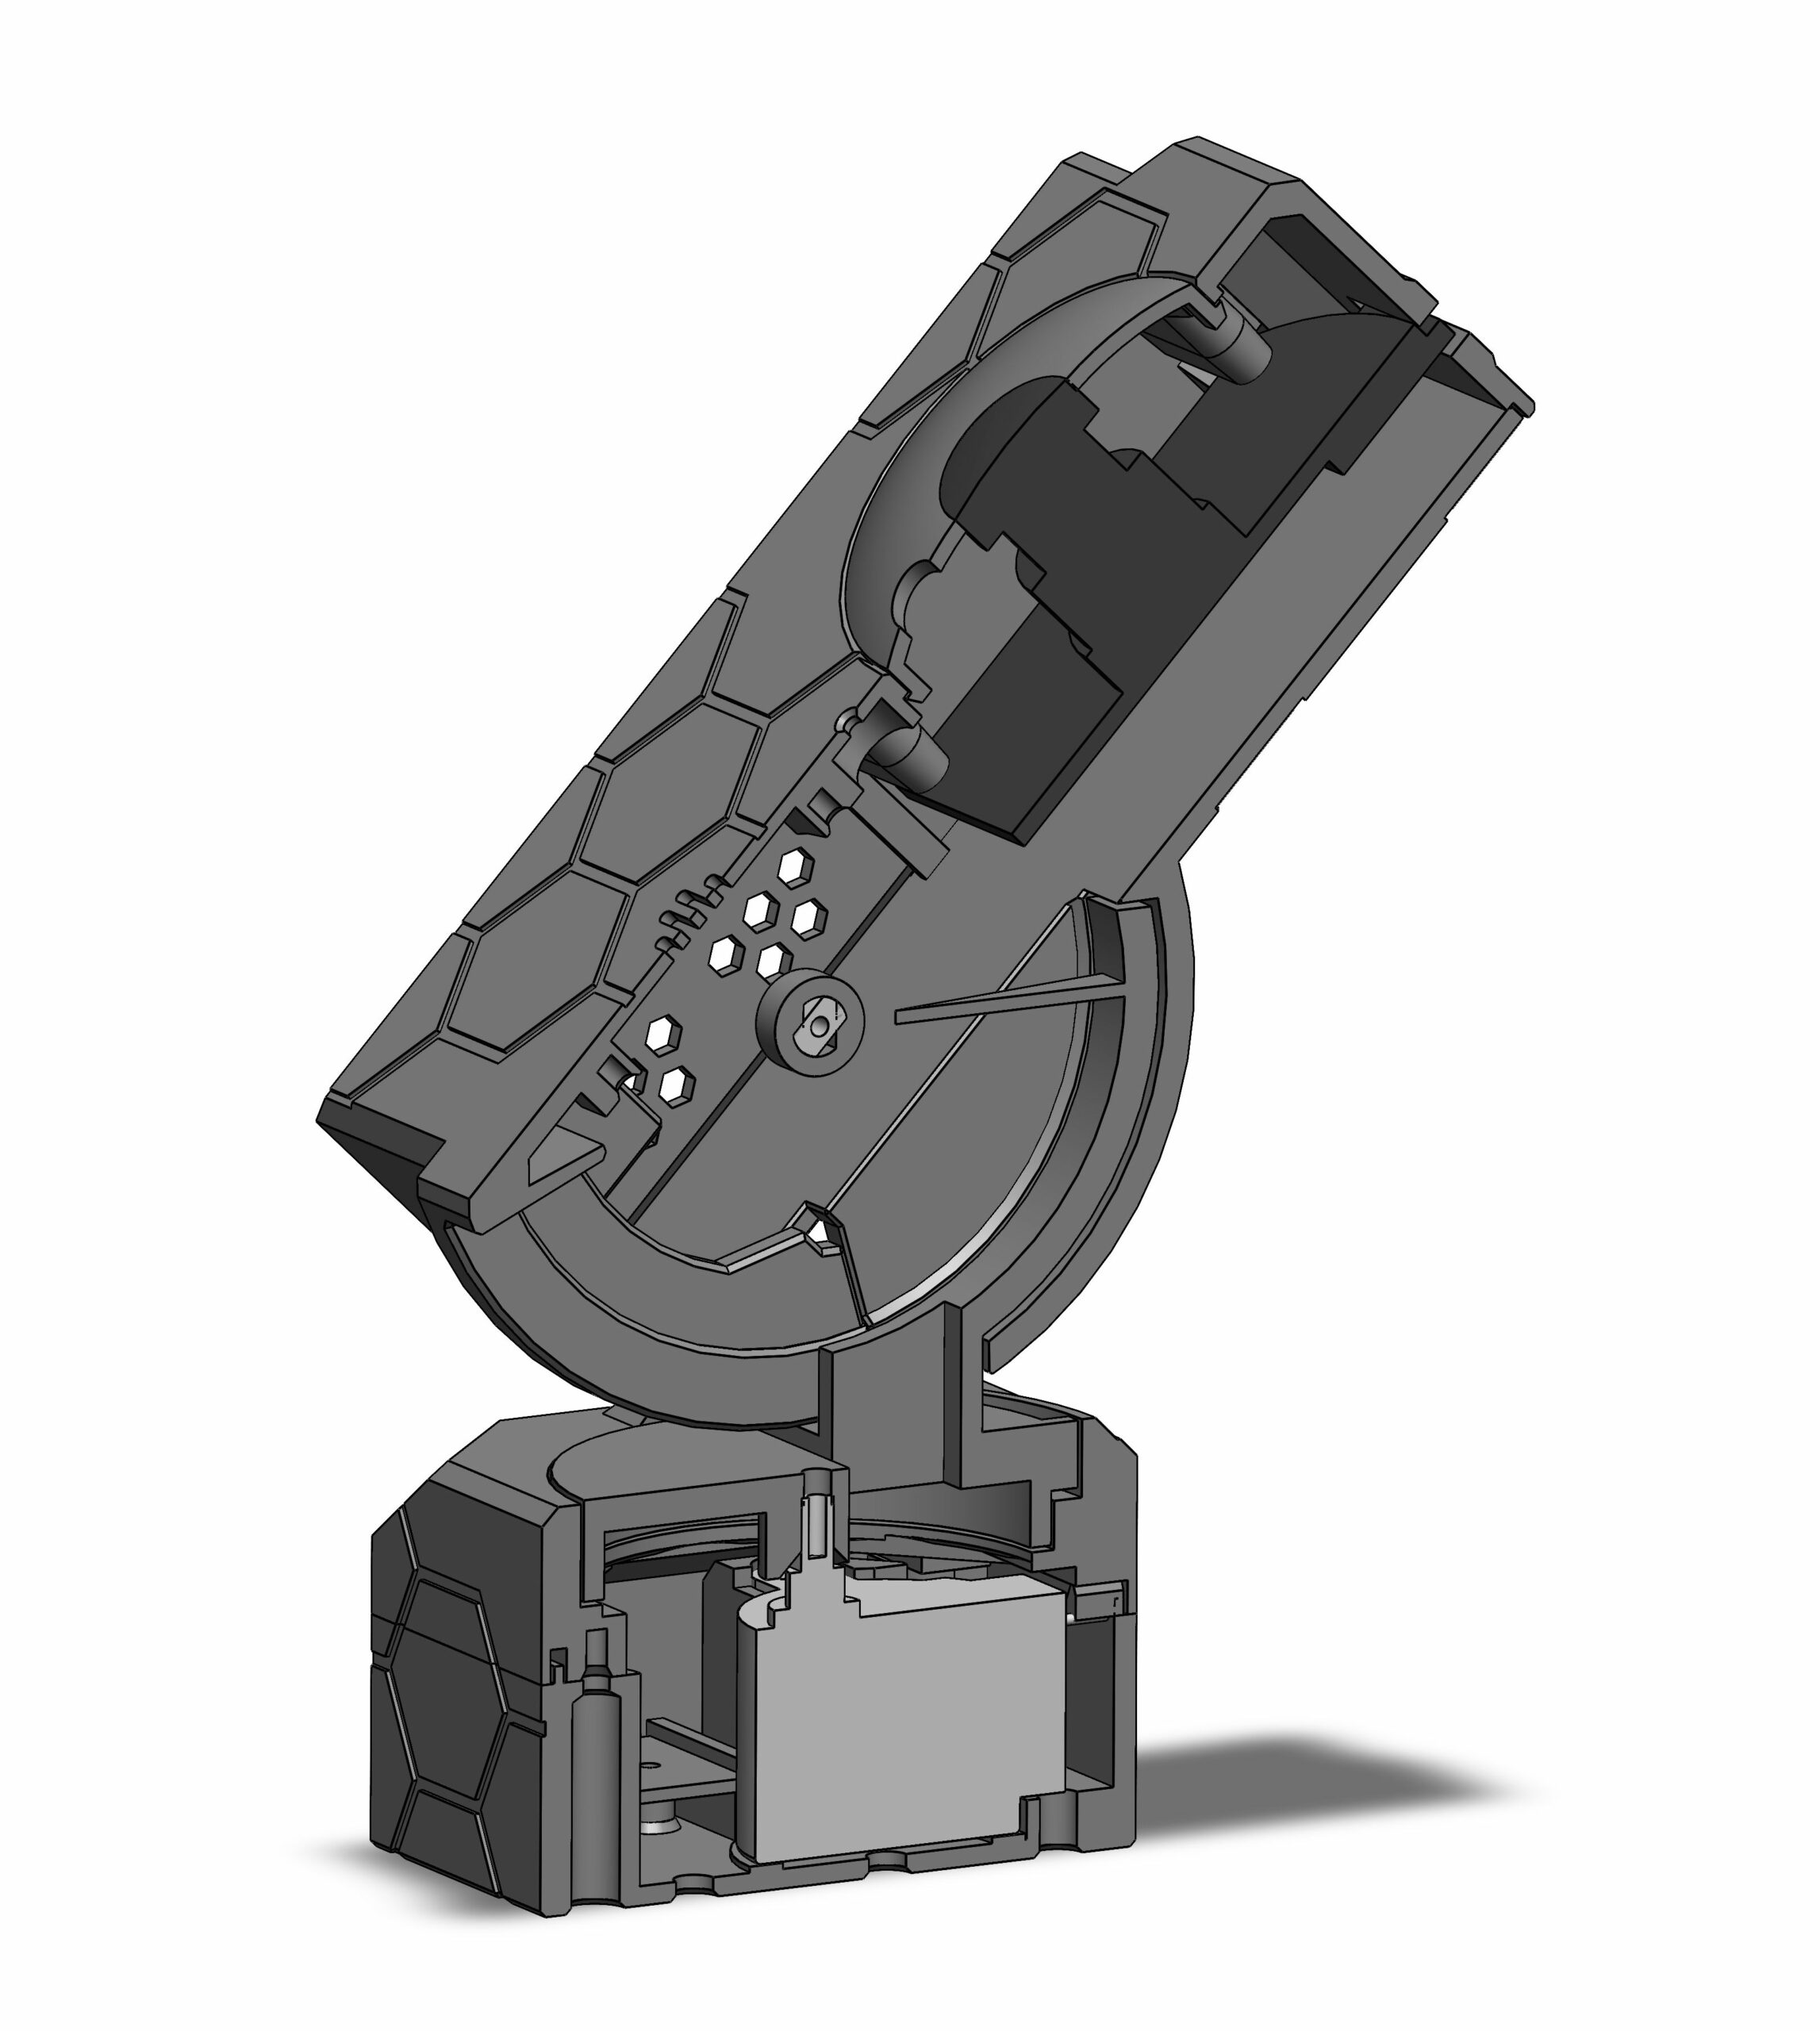
Designed in SolidWorks
The entire model was designed in SolidWorks, ensuring:
- Precise geometry
- Clean part interfaces
- Accurate fit for all original camera components
This guarantees a professional result and smooth assembly.
Assembly Overview
Assembly is done step by step using the original camera components:
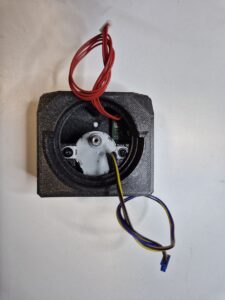
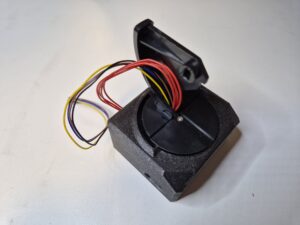
Step 1:
Disassemble the original Prusa Buddy camera
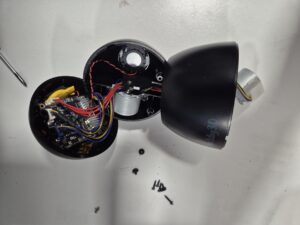
Be careful with the small screws.
Note: one screw is hidden below the bottom pad.
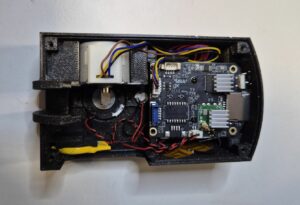
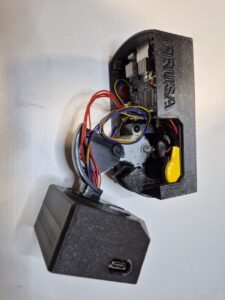
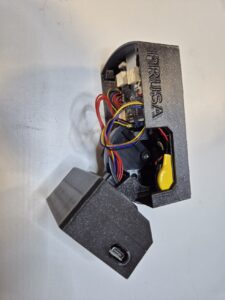
STEP 2:
Install components into the upper shell
Mount the PCB, reconnect the components, and ensure correct motor connection and cable orientation.

Step 3:
Install components into the lower shell
Insert the magnets if used.
Close the assembly carefully, watching cable routing.
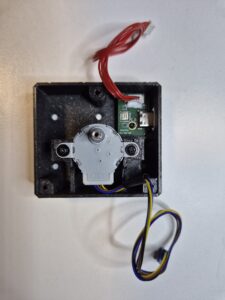
Step 4:
Reinstall the original camera servo bracket
Step 5:
Connect the remaining components
Align the upper and lower shells and assemble them together, paying attention to cables. Edit: install the side cover before the next step.
Close the assembly with the top cover
Make sure no cables are pinched.
Once assembled, the result is a clean and integrated camera mount, especially well suited for the Prusa XL.
Final Note: Camera Orientation
After installation, don’t forget to adjust the camera orientation: In Prusa Connect, rotate te camera image by 180° to display it correctly.
Final Thoughts
The Buddy Hex Former is a simple yet effective upgrade for Prusa users who want:
- Better camera framing
- Improved aesthetics
- A design that feels native to the Prusa ecosystem
It’s a great example of how 3D printing can enhance existing hardware without compromises or irreversible modifications.